
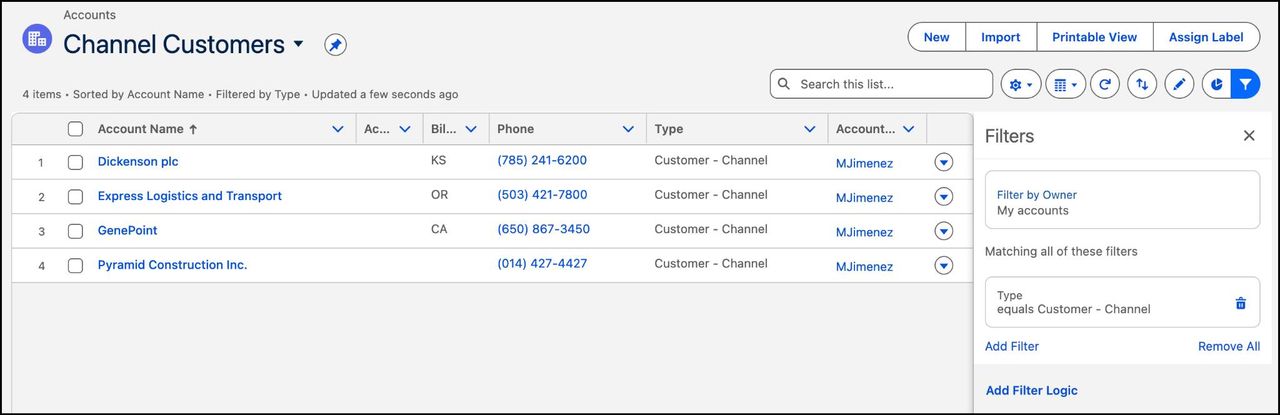
Most sales and service teams open Salesforce every morning on the same screen: a list of records. Yet many users still scroll "All Accounts", export to Excel to filter, then paste updates back by hand. Well-built Salesforce list views remove most of that friction. This guide gives admins and team leads five practical tips to turn list views into daily work queues, with the exact steps to set them up in Lightning Experience.
Tip 1: Build focused Salesforce list views with filter logic
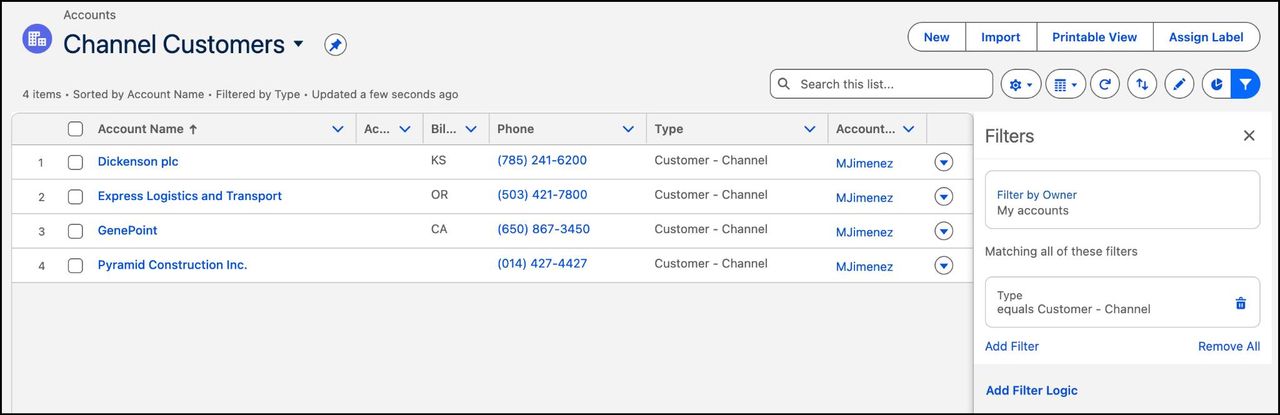
A list view is only as useful as its filters. Instead of one huge "All" list, create small views that answer one question each: "my open opportunities closing this quarter", "channel customers in the West region", "cases waiting on the customer".
The Trailhead module on creating and customizing list views walks through the basic procedure:
- Open the object tab (for example Accounts) and choose New from the list view controls (the gear icon).
- Name the view and choose who can see it: only you, all users, or specific groups.
- Click Add Filter, then pick a field, an operator (such as equals) and a value. Add as many filters as you need.
- When conditions should not all apply at once, use Add Filter Logic and write an expression such as
1 AND (2 OR 3). - Click Save, then check the record count before sharing the view.
Two habits keep views reliable over time. First, filter on stable fields (status, type, owner, date ranges) rather than free-text fields that users fill in differently. Second, prefer relative date filters such as "this quarter" over fixed dates, so the view never goes stale.
Tip 2: Show the right columns and sort for action
The columns decide whether users can act from the list or have to open each record. Use Select Fields to Display from the list view controls to move fields between the available and visible lists. Then click a column header to sort ascending or descending.
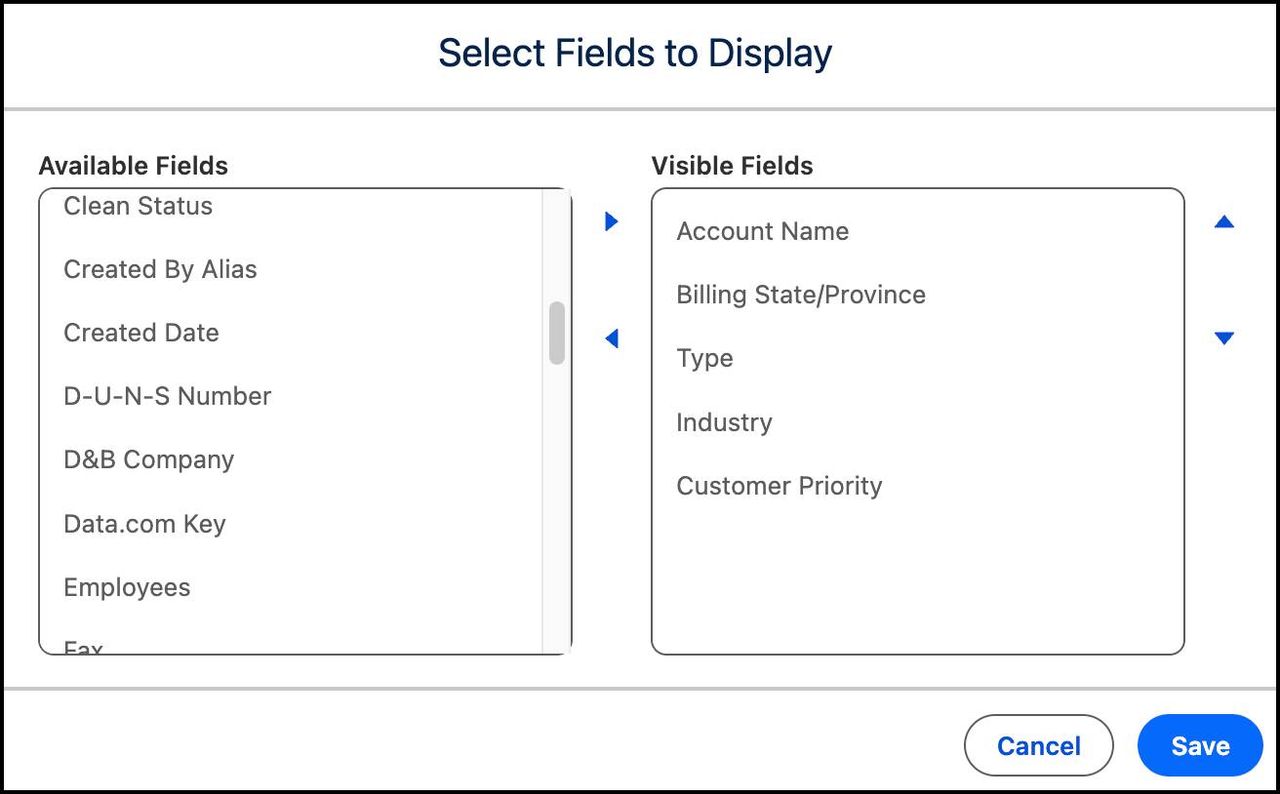
A simple rule of thumb for choosing columns:
- Identify: one or two fields that tell the user which record it is (name, account).
- Decide: the fields that drive the next action (stage, next step date, priority).
- Act: the fields users update most often, so they can edit them in place (see Tip 3).
- Remove: anything users never read. Five to seven columns are usually enough.
If you also tidy record pages, align both: the fields you show in the list should match the ones you highlight with Dynamic Forms on record pages.
Tip 3: Edit records inline instead of exporting
Inline editing is the biggest time saver in list views. According to Trailhead's list view guide, users hover over a cell: a pencil icon means the field is editable, a lock icon means it is not. They type the new value, press Return, then click Save. Users can also select several records and update the same field across all of them in one go.
Before you promote inline editing to your teams, check these points:
- Field-level security: users can only edit fields their profile or permission sets allow. If a column shows a lock, review access rather than granting broad edit rights. Our permission set groups tips explain how to keep this clean.
- Validation rules and automation: an inline save runs the same rules and flows as a save from the record page, so test a mass update on a few records first.
- Visibility still applies: a public list view does not grant access to records or fields that sharing settings hide.
Tip 4: Use Kanban and list view charts for quick pipeline reviews
Not every review needs a full report. Two built-in display options turn a list view into a lightweight dashboard.
Kanban view. Switch the display from table to Kanban with the display toggle. The first time, choose a numeric or currency field to summarize (such as Amount) and a Group By field to create the columns (such as Stage). Cards keep the list's filters and columns, and dragging a card to another column updates the record. Kanban also flags records that need attention, for example overdue tasks, no open activities, or no activity for 30 days.
List view charts. Click the charts icon, then use the gear to create a New Chart. You choose a chart type, an aggregate type (Sum, Count or Average), the field to aggregate and the field to group by. Charts belong to the object, so a chart created on Opportunities appears on every opportunity list view you can see, except Recently Viewed.
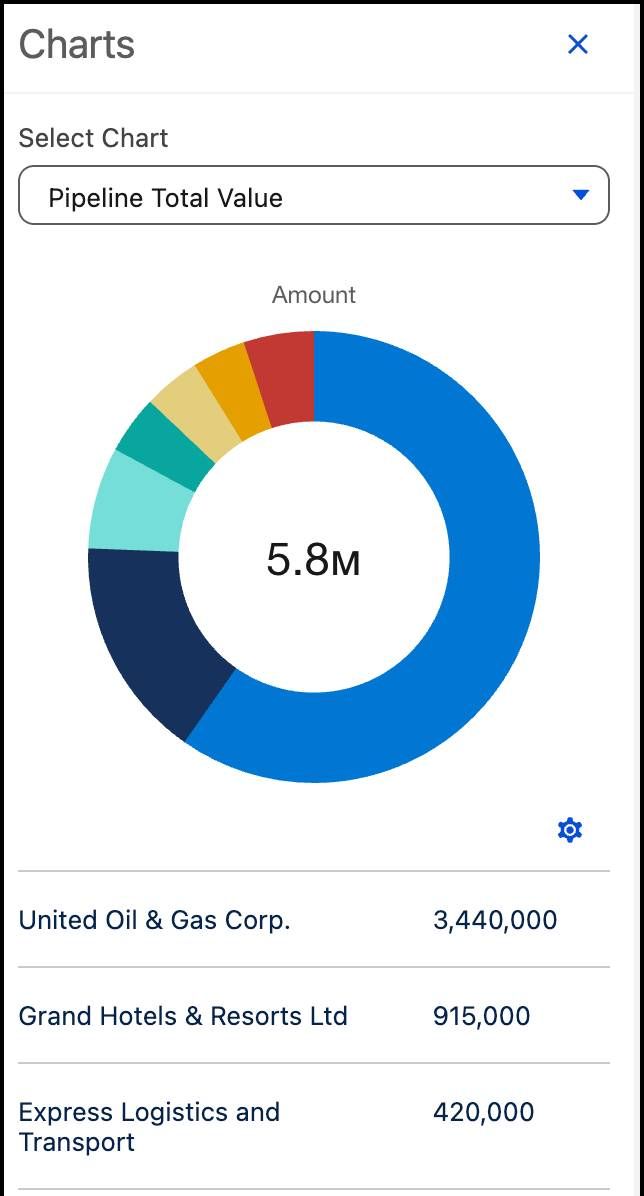
Choose Kanban if your team moves records through stages during a meeting. Choose a list view chart if you only need a quick total or distribution next to the list. For trends, comparisons over time or exports to management, switch to reports; our report builder tips cover the next step.
Tip 5: Pin, share and clean up your list views
Good views get lost when nobody knows where they are, and bad ones multiply.
- Pin the default: each user can pin a list view so the object tab opens on it instead of Recently Viewed. Pinning only affects the user's own workspace, so show teams how to do it during onboarding.
- Share deliberately: for team views, share with a public group or role rather than "all users" when the content is team-specific.
- Console users: in Lightning console apps, split view keeps a list on one side of the screen while agents work on records in tabs, which suits case queues in Service Cloud.
- Prune twice a year: list public views per object, merge duplicates and delete those nobody uses. Name team views with a clear prefix (for example "SALES –" or "SUPPORT –") so they sort together.
What to do now: a one-week list view rollout
- Day 1: ask each team lead for the three questions they answer every morning.
- Day 2: build one list view per question with stable filters and filter logic.
- Day 3: set the columns using the identify, decide, act rule and test inline edits on a sandbox or a few records.
- Day 4: add one Kanban or chart view for the weekly pipeline or backlog review.
- Day 5: share the views with the right groups, show users how to pin them, and remove obsolete public views.
List views are a small feature with a big effect on adoption: when the daily screen already shows the right records, users stop exporting and start updating Salesforce directly. If your Sales Cloud or Service Cloud setup has grown messy, our Salesforce Sales Cloud services can help you redesign list views, pages and access in one pass.